I have made some huge upgrades and changes to my grow room in preparation for the second grow. Here is a summary of what has happened:
- Dedicated a small room to growing
- Split room in half using a 2 x 4 wall covered in reflective white tarp
- Emptied the room completely including all carpet, padding, moulding, etc.
- Scraped the popcorn ceiling off and painted the ceiling white
- Cleaned and disinfected the room from top to bottom
- Sealed the now cement floor
- Painted the walls with a bright white paint
- Sealed off the old and dirty air conditioner
- Fixed the window – black out, insulated, sealed and allowed for venting
- Built two sturdy 2 x 4 shelfs to support the tray (replace flimsy plastic one i was using that always makes me nervous)
Wow, that is a lot accomplished even though it took way too long! Here are some pictures of the changes.
There are now new walls built from 2 x 4’s, covered in a heavy duty double sided mylar. One side is a shiny highly reflective white and the other is black for great light proofing. Here is one of the walls from the inside.

The frame was wrapped with the mylar on one side before it was put up. As you can see a standard size door was built in for easy access using a large zipper. I put velcro along the bottom to keep it lightproof with a butcher flap on the outside for the light the zipper allows through.
In this picture you can also see the now cement floor and smooth white ceiling.
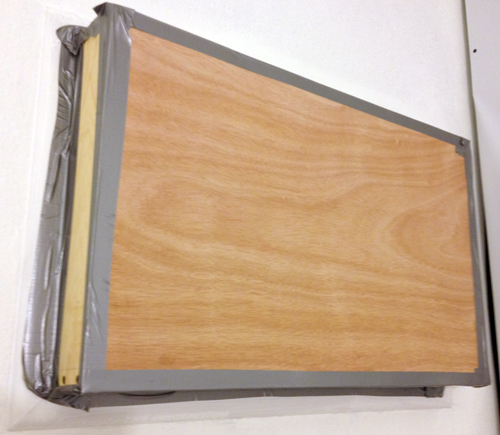
I also took some time to seal off my air conditioner since I did not want to use it this time. It is very old, disgusting and you can’t really clean it. The room is much cooler now anyway so I shouldn’t need it.

I built a box around it and then filed around the edges of the wood with caulk. Once that was dry I taped the edges off with duct tape just to be extra safe. I don’t think that anything can get in or out from here now.
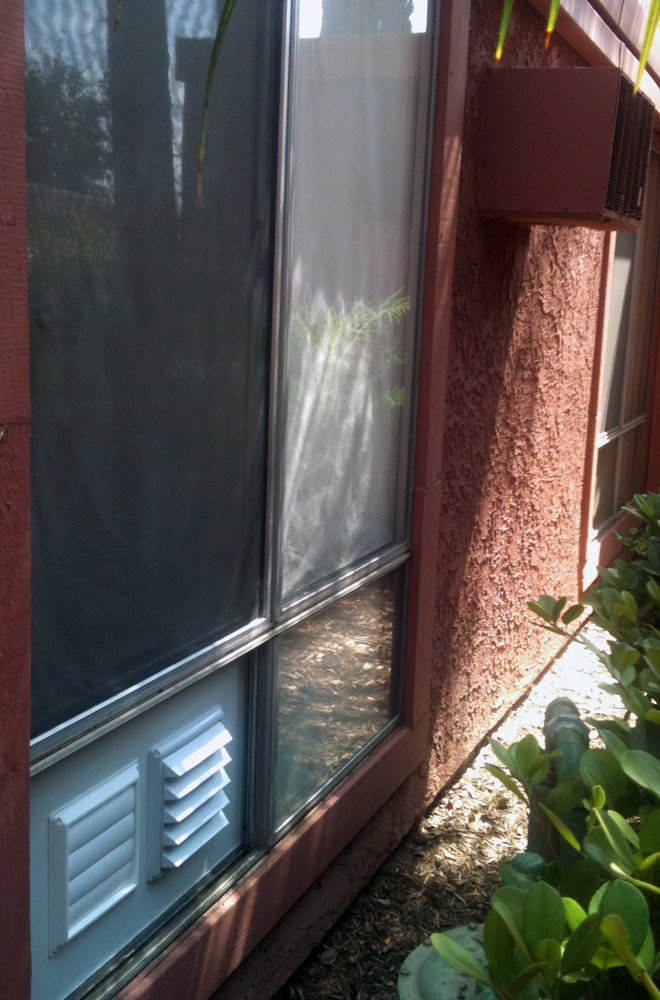
Another large project I took on was properly sealing off the window and fitting it for ventilation. First I put up black-out fabric in the three parts of the window that will be covered up. I made sure that from the outside the fabric looked like a closed curtain.

The bottom smaller window is left permanently open and fitted with a wood panel with two holes cut out for the vents. There is a 2 x 4 put into the middle to support the wood that will eventually cover the whole window.

To ensure that nothing could get in or out and for temperature control I stuffed the window full of insulation. I used a roll of regular attic insulation and cut it to fit the window. I used duct tape to hold it in place and just filled up the window cavity the best I could.

I then took a piece of wood and screwed if over half of the window, covering half of the middle 2 x 4 which is just used so you have something to screw in to. To fill the other half of the window with insulation I built a quick 2 x 4 frame to place around the vent holes.

The last step was to seal off the other half of the window with a piece of wood, covering the other half of the middle 2 x 4. I had to cut a square out of the bottom to match up with the frame that was built for the vents. I then sealed all the edges with duct tape.

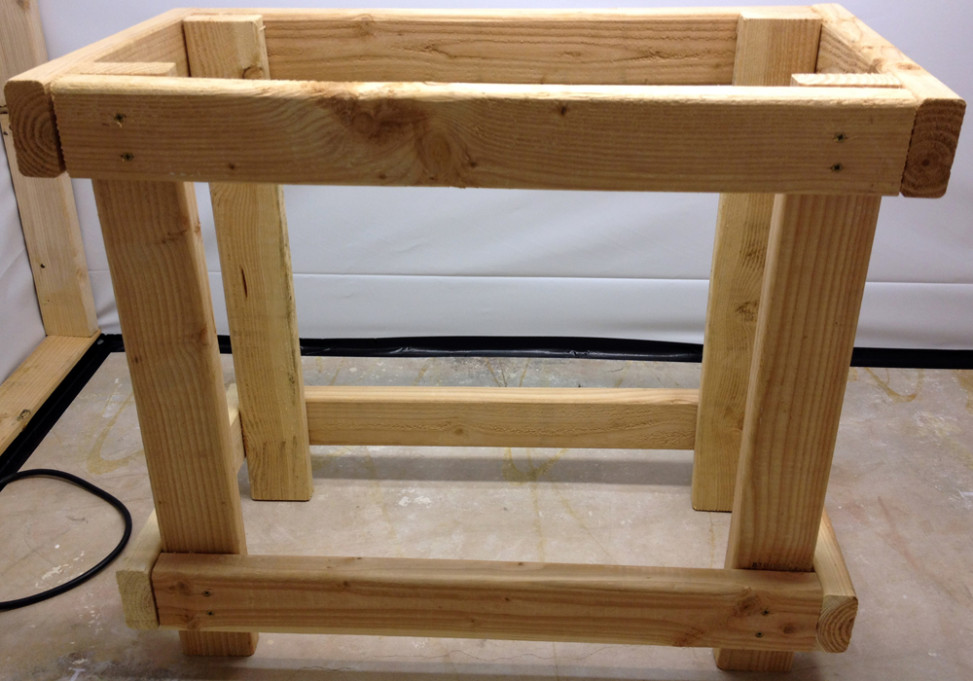
The last thing built were two sturdy benches to put the tray on, one for each room. These are very sturdy and were easy to build, takes about an hour each.

Tools I used:
- 2 x 4’s
- Circular saw
- Drill
- Deck Mate all purpose screws, 2 1/2″ – 1 lb. box
- Measuring tape
- Right angle triangle
- Level
- Pencil
Here are the instructions I used to build the workbench, I just built it to the size of my specific tray. I made sure there was room for the spouts on both sides, that it would sit properly and I could put a shelf on bottom when I get the wood.


Leave a Reply